Supabase
Supabase is completely open-source. Personally, we're using Supabase itself to host the database. The experience has been smooth with no issues. You can also use its self-hosting capabilities to host it on your own server or using Docker as shown in the guide.
We're using Supabase itself to host our database, so this guide will revolve around that. Although, if that's not the case and you're using some other option such as AWS (opens in a new tab) or other cloud platforms to Self-host Supabase (opens in a new tab), the steps are pretty much the same.
The database service used in Framecast AI is Supabase (opens in a new tab). Supabase is an open-source Firebase alternative. It is a service that provides a Postgres database with a RESTful API, authentication, and real-time capabilities.
To use Supabase for production environment, you need to create an account on Supabase (opens in a new tab) and follow the given steps:
Create A New Project
Once you have created an account on Supabase and a new organization, create a new project by clicking on the
New Project button. Once the project is created, you will be redirected to the project dashboard.
Replacing Supabase URL, Supabase Anon Key, and Supabase Service Role Key
Replace your-supabase-url with your original Supabase URL, your-supabase-anon-key with your original
Supabase Anon Key, and your-supabase-service-role-key with your original Supabase Service Role Key. To find
these keys, navigate to your project dashboard and click on the Project Settings tab. You will be able to see
API Settings. This is where you will find these keys.
Ensure Replaced Values For Public Variables
Ensure that the replaced values are also repeated for the public variables NEXT_PUBLIC_SUPABASE_URL,
NEXT_PUBLIC_SUPABASE_ANON_KEY, and NEXT_PUBLIC_SUPABASE_SERVICE_ROLE_KEY. For certain services, the
public variables are used to access the values in the database.
Create Database Tables
In your source code folder, you will find a folder named supabase. This folder contains the SQL files for the
database tables. Navigate to this folder and open migrations folder inside. You will find the SQL file named
RandomNumber_remote_schema. Open it and copy all of the PostgreSQL queries. Now, navigate to your project dashboard
and click on the SQL Editor tab. Paste the copied queries in the SQL Editor and click on the Run button.
This will create the necessary tables in your database.
Connect SMTP
Supabase by default has a limit on 3 emails/hr. Since it costs them money obviously, it's advisable to use our own
email service. For this example, we're using Resend (opens in a new tab). Feel free to use any other service you want.
The procedure for all of them is pretty much the same. Navigate to Project Settings and click on Authentication
from the left sidebar. Scroll down until you see SMTP Settings. Enable SMTP Settings. Once enabled, enter the
following details:
Sender email = anyname@your-resend-verified-domain e.g. myheadshots@codewithme.com
Sender name = any name (This will be the name used for your email entry as the sender's name)
Host = smtp.resend.com
Port number = 465
Minimum interval between emails being sent = 60
Username = resend
Password = your-resend-api-key
Except the sender details (email and name), other settings would be different for different email providers such as AWS or Titan Email.
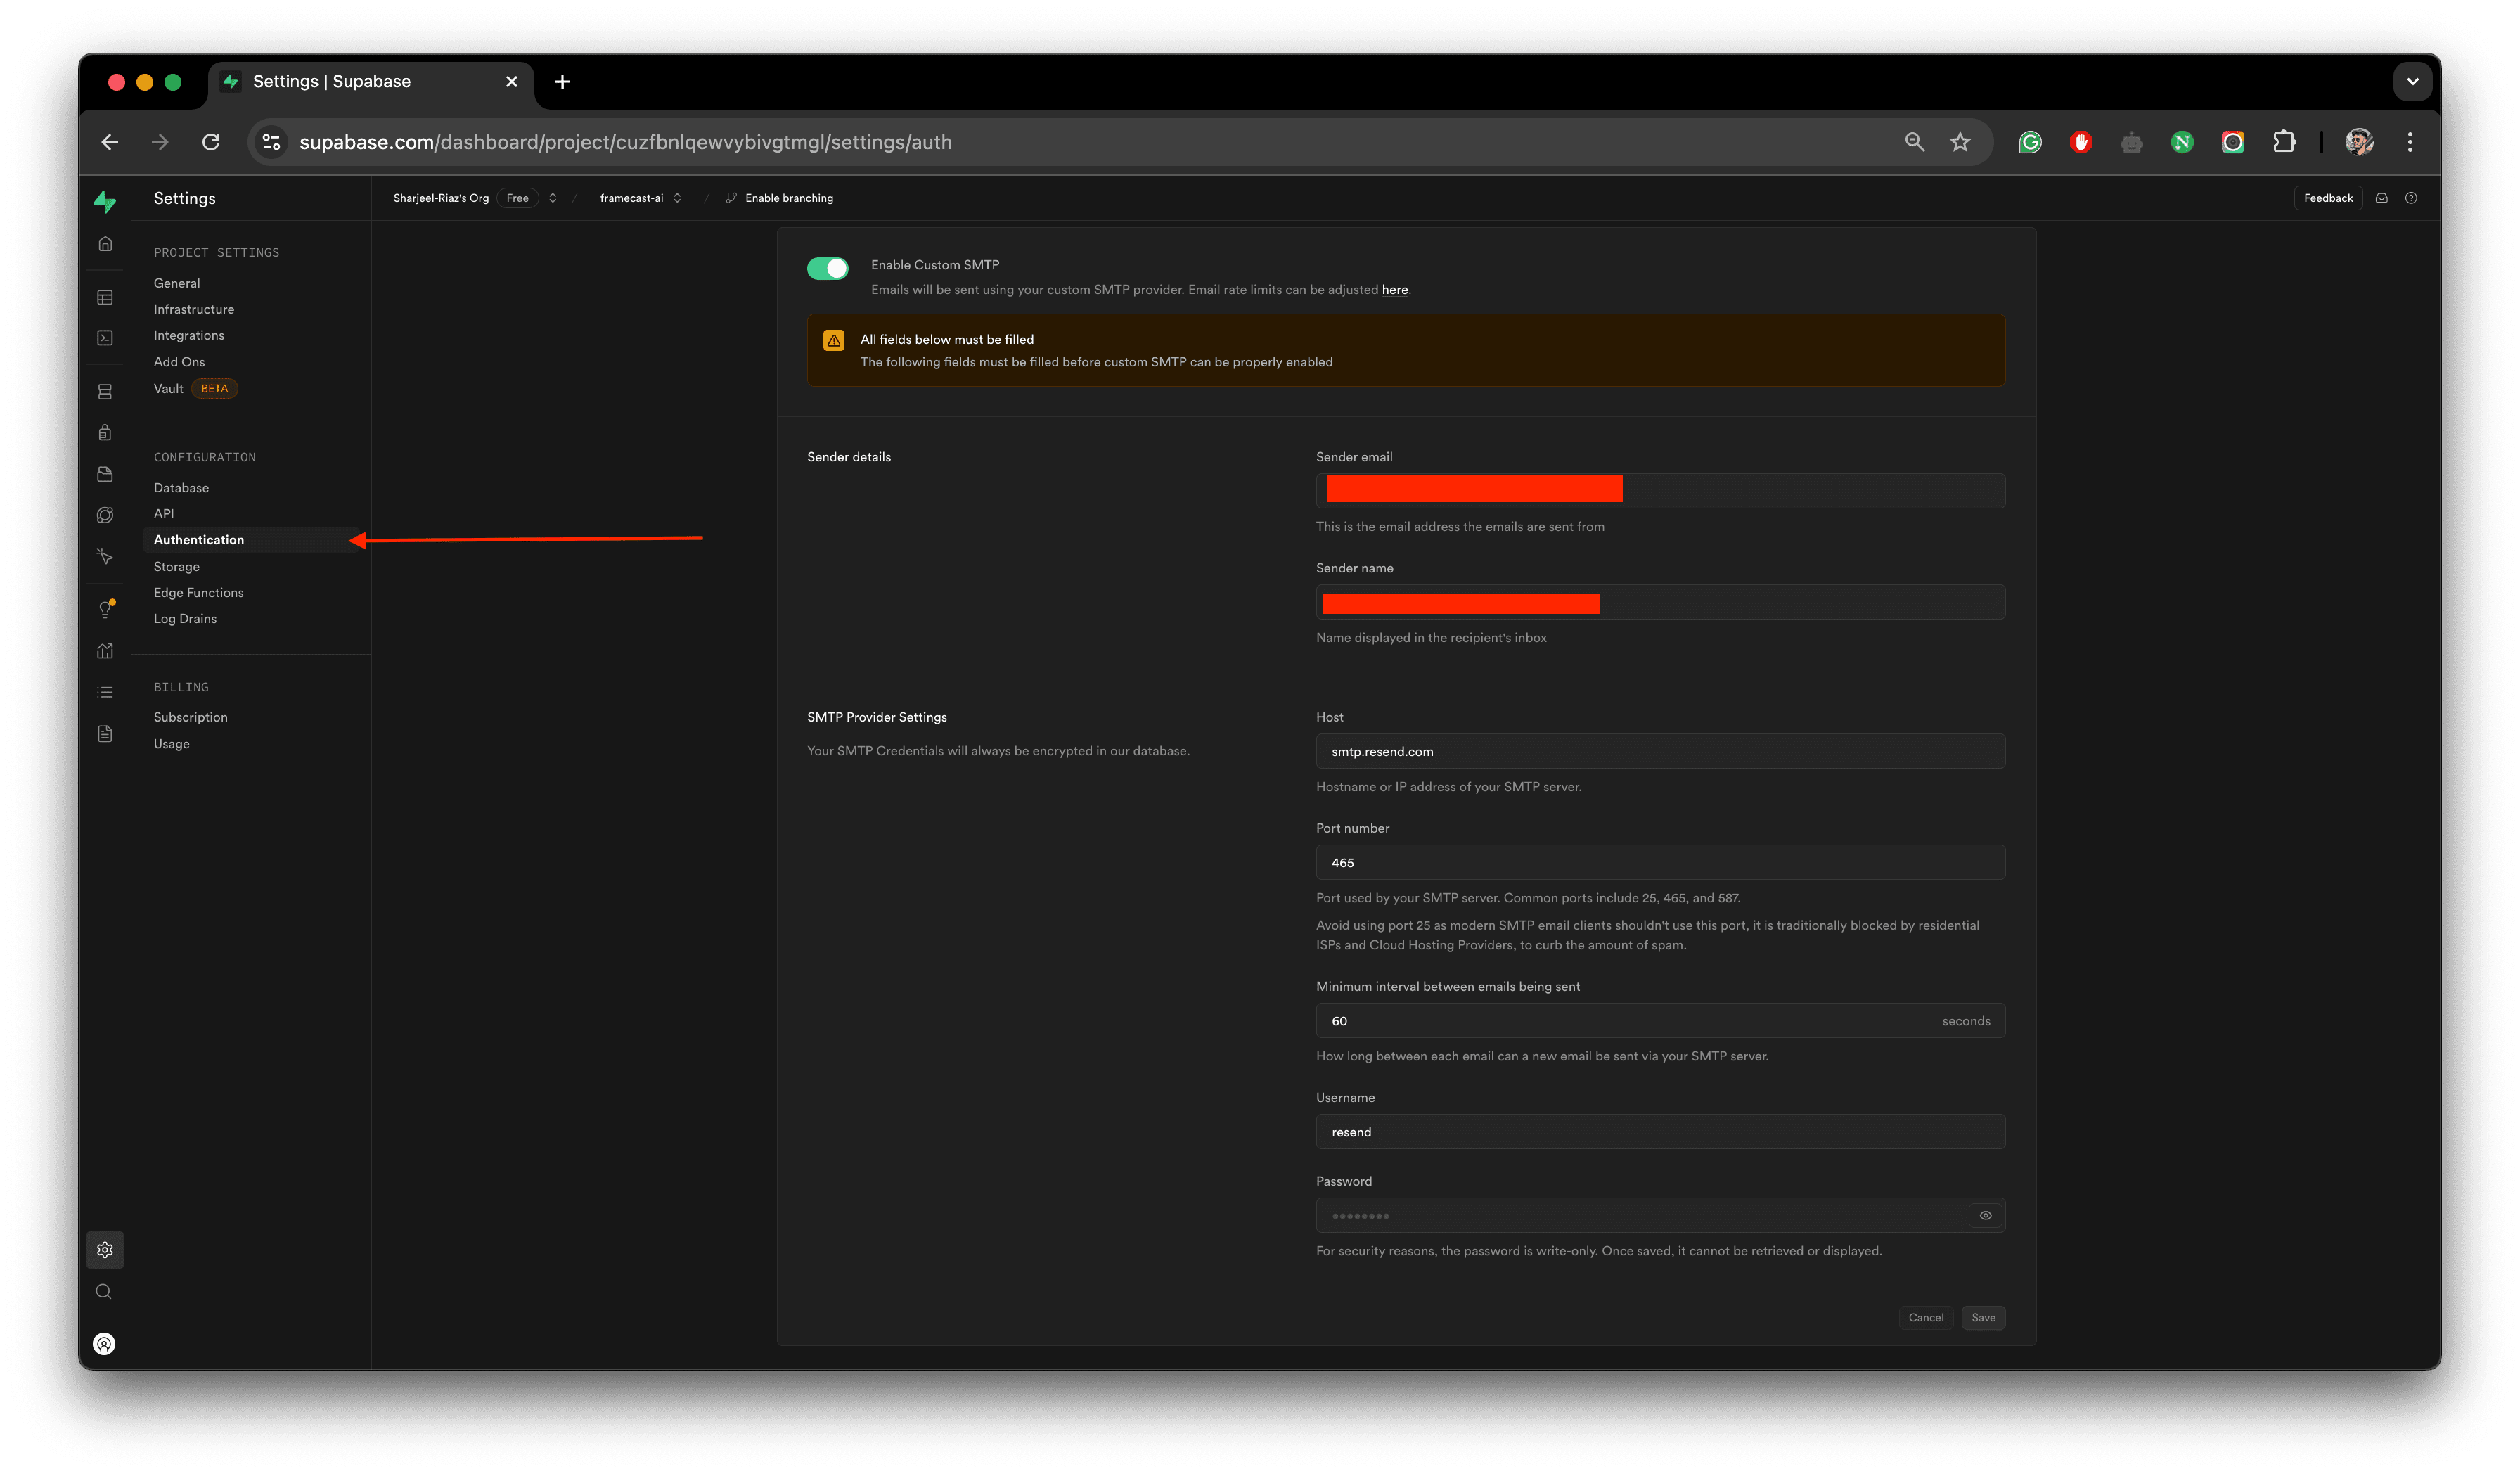
An example of how to setup your SMTP provider settings in your supabase project.
Setup Authentication
The last step is to setup your authentication services. Navigate to the Authentication tab from your sidebar. Click
on Email Templates. From the navigation tabs on top, select Magic Link. Paste the following code snippet in the
Source textbox:
<h2>Magic Link</h2>
<p>Follow this link to login:</p>
<p><a href="{{ .SiteURL }}auth/confirm?token_hash={{ .TokenHash }}&type=email">Log In</a></p>
Feel free to customize the email template as per your requirements. Once done, click on the Save button.
The following step requires you to have the application deployed. Right now, you can enter a dummy URL and redirect URL. Once you have deployed your application, you can come back and update these URLs.
Afterwards, Navigate to the URL Configuration tab from the sidebar. In the Site URL field, enter your
application's URL and click on the Save button. Similarly, for the Redirect URLs. Click on Add URL button
and add a new URL like given below:
Site URL = your-application-url
(e.g. https://framecast-ai.vercel.app/ make sure there's a trailing slash)

Redirect URL = your-application-url/**
(e.g. https://framecast-ai.vercel.app/** make sure there's a trailing slash with two asterisks)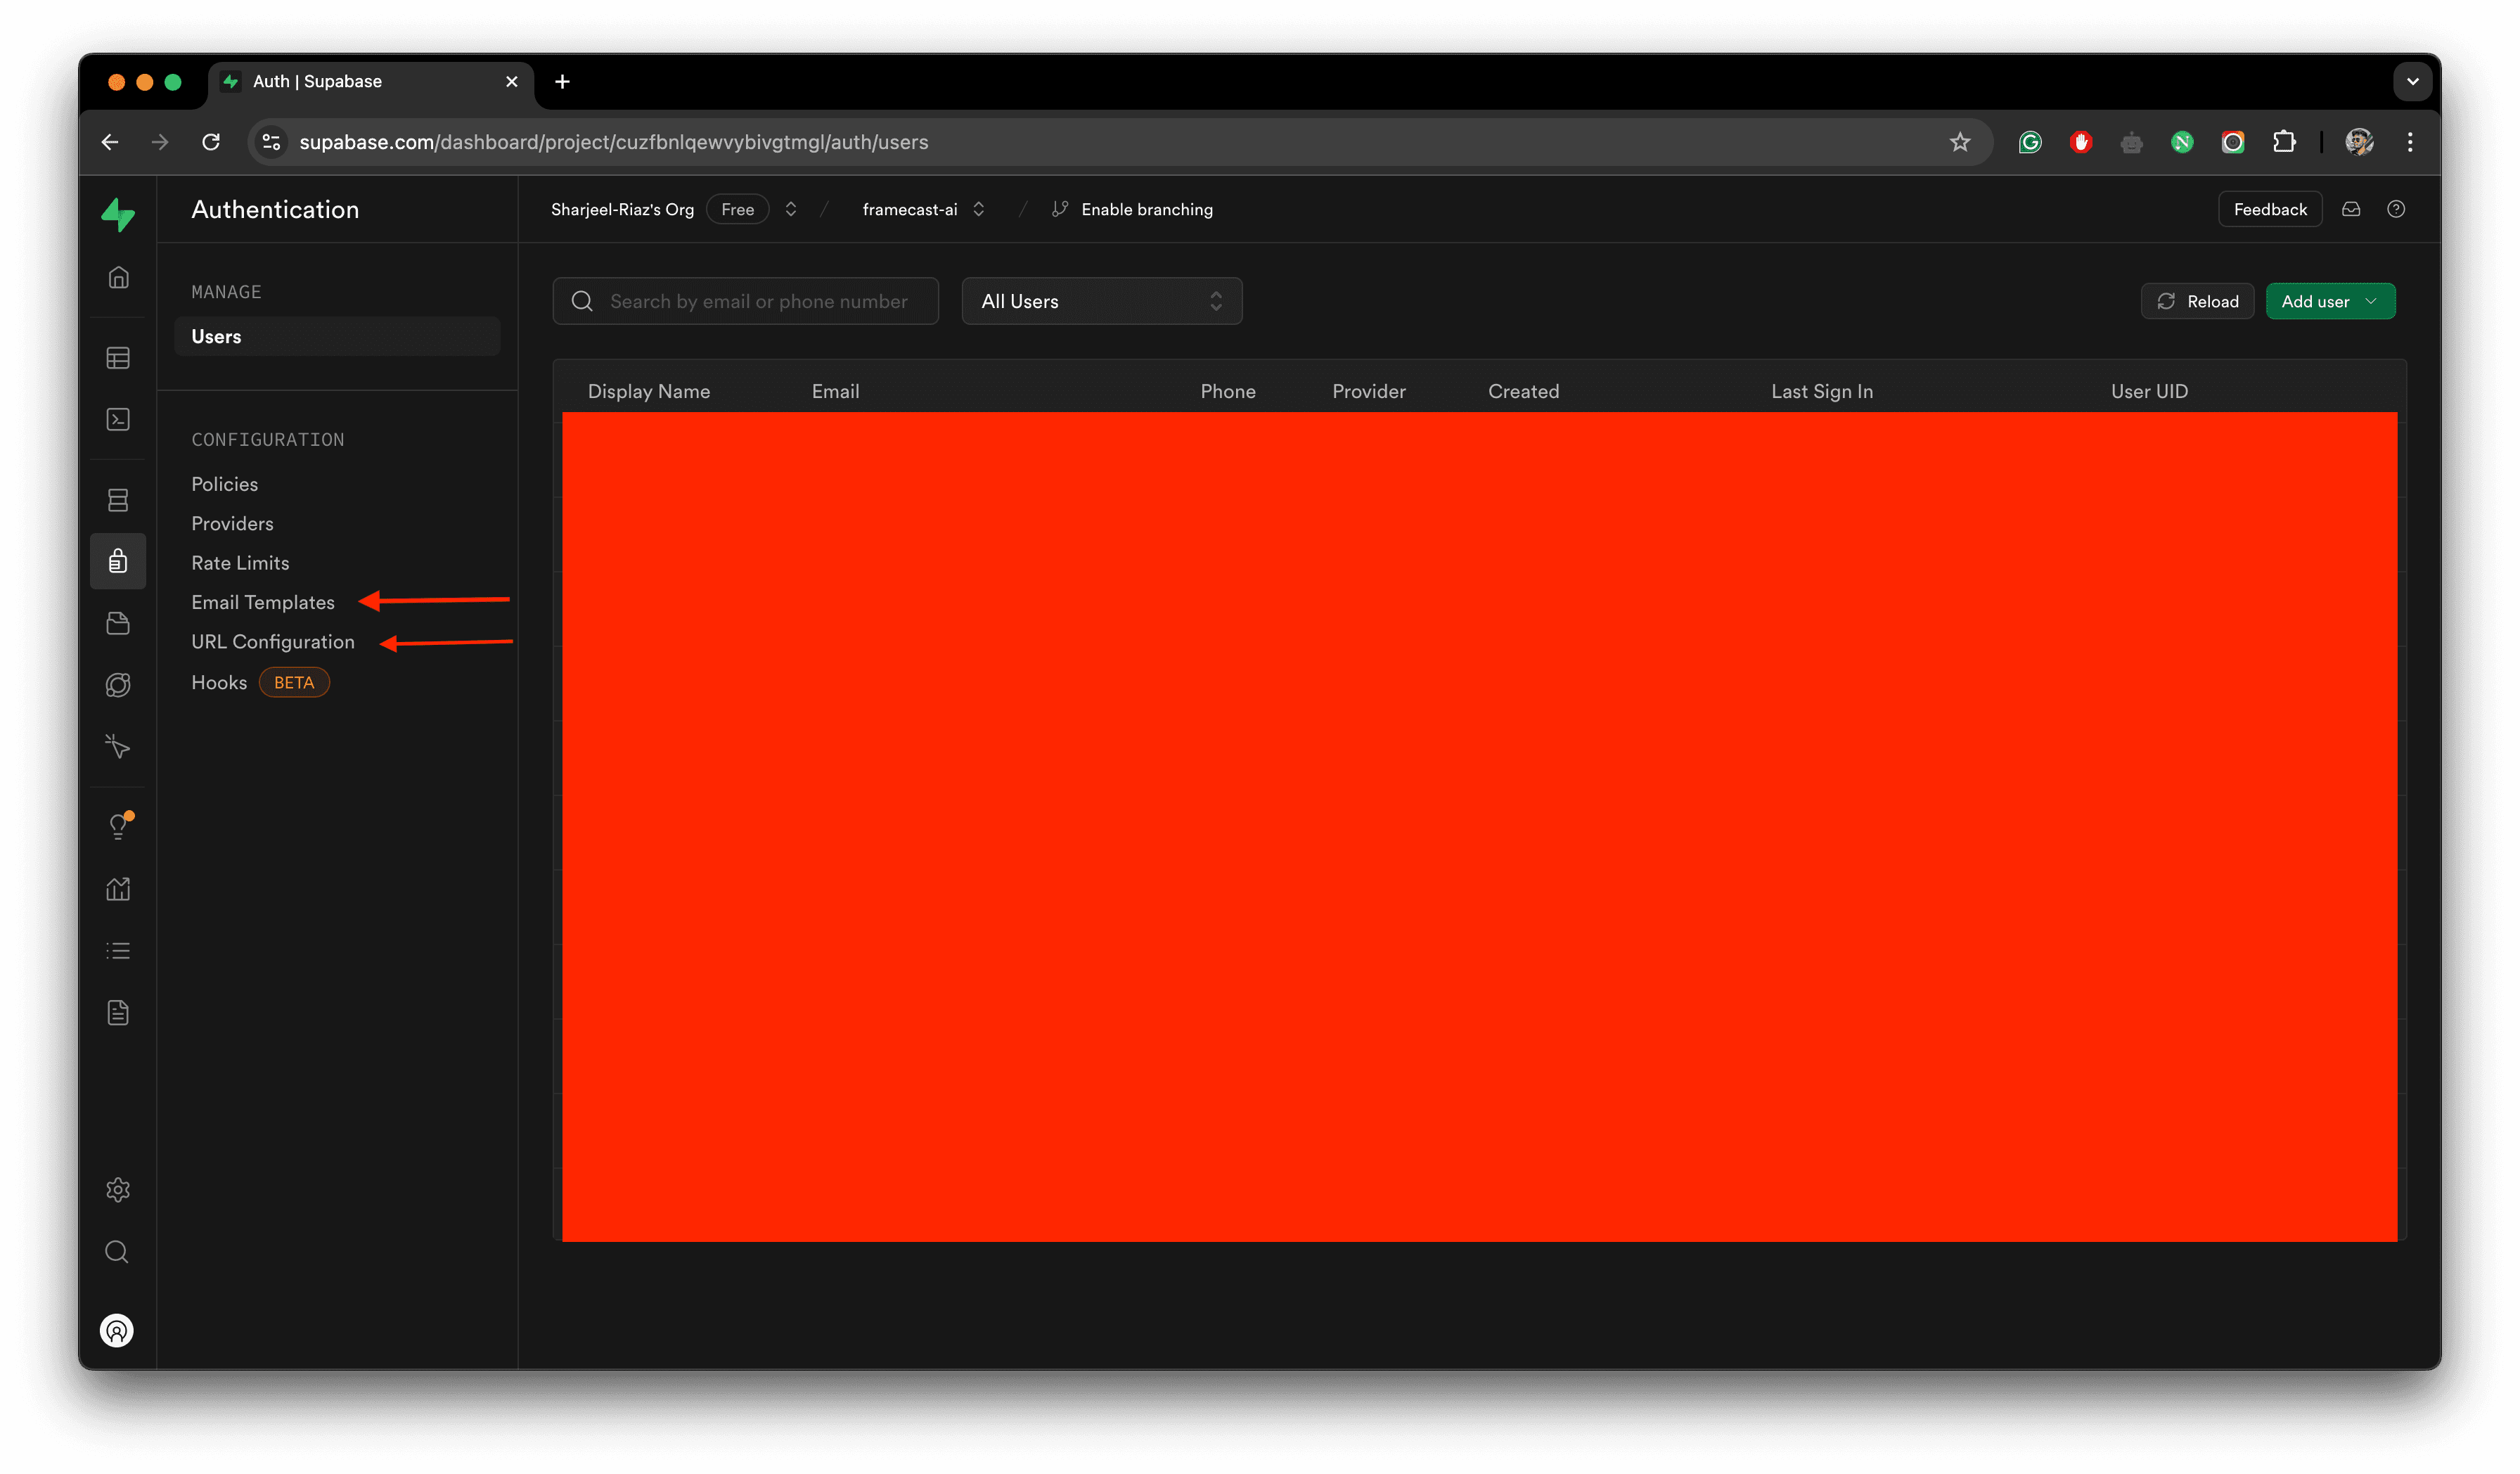
An example of where to navigate on your supabase dashboard.
This completes your database setup on Supabase. You can now proceed to deploy your application.